
 The role out sheet contains a cheap but sturdy set of metal sculpting utensils that I got off of Amazon.com. Now traditionally people use green-stuff to sculpt. I detest the stuff because I have to decide pretty quickly if what I've made is worthwhile or crap before it cures and solidifies forever. So I looked for a material that would be a little more forgiving: FIMO clay is cheap but really really soft AND you have to bake it. Not something for gap filler or conversions. It is really hard to work with because of the overall softness. Not really the material for sculpting fine detail BUT if I don't like what I've made I can squish it and start over.
 These were made with FIMO, the body I created to attach these arms to, sadly, was not spared my wrath.
After attempting several different sculpts a friend of mine gave me something he calls sculpty or something. It is more of a firm material than FIMO so it is much easier to attempt finer work (you still have to bake it).
So I started Mylecia, she was supposed to be my first Slaanesh fiend and thus I started to compose each part separately with the intention to cast and mold the figure (more on that later).


Several problems became immediately apparent:
+ I started with a plan.
- I had no concept of scale (see last picture).
+ The wireframe (made of paperclips) really helped define a pose.
- I tried to make each piece separately.
- Despite the wireframe clay still seemed to slip off.
- I did not have a good way to hold the model while I worked with it.
+ I intend to work on an intermediate stage: you can see here Mylecia is darker than the original sculpty clay as she has been baked and assembled. Now I can add extra layers of clay for further detail.
-This is really hard and potentially time consuming.
+ This is really fun and there's no where to go but up from here.
What's next:
- Add a fur/feather/something detail to her and the legs. The original plan was a sort of fin that connected the legs and tail but I might leave that out.
- Sculpt a full model and not in pieces. I'll mold things some other day.
- Plan the scale out a little better.

 I sculpted a mouth full of teeth. I have no idea what I'm going to do with it but I love it. This is the power of making your own stuff: only you will love it, at first...
Let's turn to my other endeavors: molding and casting!
 I mentioned awhile back that I found a fantastic dead beetle and attempted to mold and cast it. BEHOLD! The legs... they did not turn out but the body did and for once I was enthusiastic about my future with being able to cast and mold things.
Custom bases:

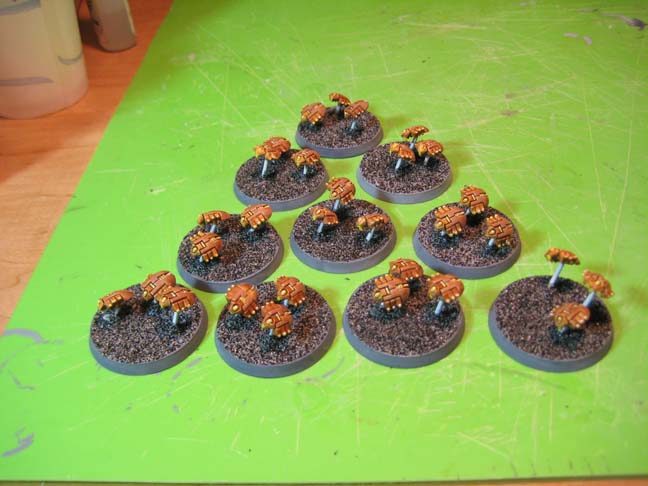
 I just realized I didn't take a picture of the mold itself. The white plastic bases are the new casts with the underside full in order to provide a little more density to the cast. The molding provides fantastic details of the original: the electric chips I used for some of the bases casted so well you can see the grooves in the them (could NOT get that detail in a picture). Also my skull-covered base turned out rather well.
And finally, painted scarabs:
 I used the Reaper Mini inks on these and I felt it turned out well. I also tried my hand at layering the yellow lights with a darker yellow and then working my way up to a white highlight. You can't see that in the picture but that's fine as it didn't turn out particularly well. Next time I would like to include more scarabs to truly make it a swarm base, like 10 scarabs crawling over each other towards one edge like a wave! That and more dynamic bases. I like my dark sand but this is basic paint then flock.
 -----
That's all for now. I'm going to be playing a 3000 point game with the new rules and the High Elves this weekend. Asur, ho!
2 comments:
Wow! The casting you have done isn't that bad at all! I am impressed to say the least.
What products do you use to cast? I have considered to try and attempt some form of casting in the past and possibly near future (i.e. Tyranid Warrior Lash Whips).
If I can figure some form of casting out I might be persuaded to make my own lash whips rather than spend $60 on 3 more venomthropes of which I only need the lash whips...
The beetle is the most impressive. I can foresee some neat Tomb King conversions or Necron conversions with that cast. Great job on the bases too! If I had the ability to cast things I would have done some for my Tyranids... Alas that time has passed.
Casting and molding could be the end-all, beat-all option to making your own custom stuff (and even selling it elsewhere if the mood strikes you).
The materials used for casting and molding can be carcinogenic so bloody don't use them in a poorly ventilated closet like some idiots.
Also some of the products require a vaccuum sealer or other equipment to use so be sure what you are buying!
For molding I use Oomoo 25http://www.smooth-on.com/Tin-Cure-Silicone-/c1113_1136/index.html
It mixes 1:1 and you don't need any other equipement. HOWEVER! One of the two parts (the pink one) pours like molten bubble gum and the other is fairly viscous as well. My first few times... o.k. every time I use this I end up with a sticky mess. I suggest gloves and laying out plastic wrap (something you can throw away when you are done).
Preparation is crutial. For example: once you mold the piece, how are you going to get the original out? How are you going to hold the mold together and then get the casting material in? Etc, etc.
For casting material I use: Smooth-Cast 300 http://www.smooth-on.com/index.php?cPath=1120_1209
1:1 mix, 10 minute cure time. It pours FAST and it solidifies even faster in a very exothermic manner. Sticky messes can occur so be prepared. If there are leaks in your mold you'll find out REALLY quickly.
I'll post a demo sometime (when I get it right).
Post a Comment